Adding & Removing VLANs
This guide explains how to add and remove VLANs using the NetFoundry zLAN Console, as shown in the screenshots below.
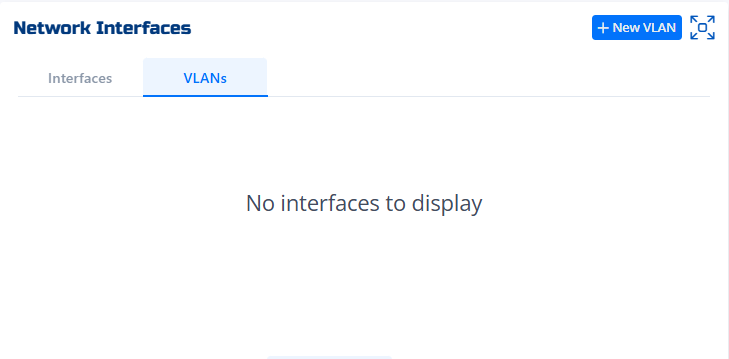
VLANs Overview
The VLANs tab displays all configured VLAN interfaces. If no VLANs exist, you'll see "No interfaces to display." To add a new VLAN, click the + New VLAN button.
Adding a VLAN
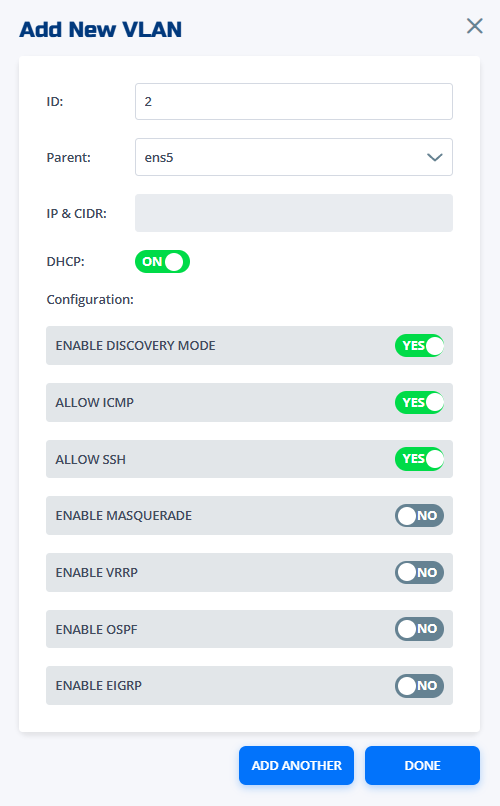
- Click + New VLAN in the VLANs tab.
- Fill in the ID (VLAN number) and select the Parent interface (e.g.,
ens5). - Enter the IP & CIDR for the VLAN interface Or Toggle DHCP ON or OFF as needed.
- Configure additional options:
- Enable Discovery Mode: Allows the VLAN to be discovered by other devices.
- Allow ICMP: Permits ping and other ICMP traffic.
- Allow SSH: Enables SSH access to the VLAN.
- Enable Masquerade: Allows NAT for outbound traffic.
- Enable VRRP: Enables Virtual Router Redundancy Protocol.
- Enable OSPF: Enables Open Shortest Path First routing.
- Enable EIGRP: Enables Enhanced Interior Gateway Routing Protocol.
- Click Add Another to add more VLANs, or Done to finish.
VLAN Configuration
After adding a VLAN, it appears in the VLANs list. Select a VLAN to view or change its configuration, rules, or details. Use the Config tab to toggle features for the selected VLAN.
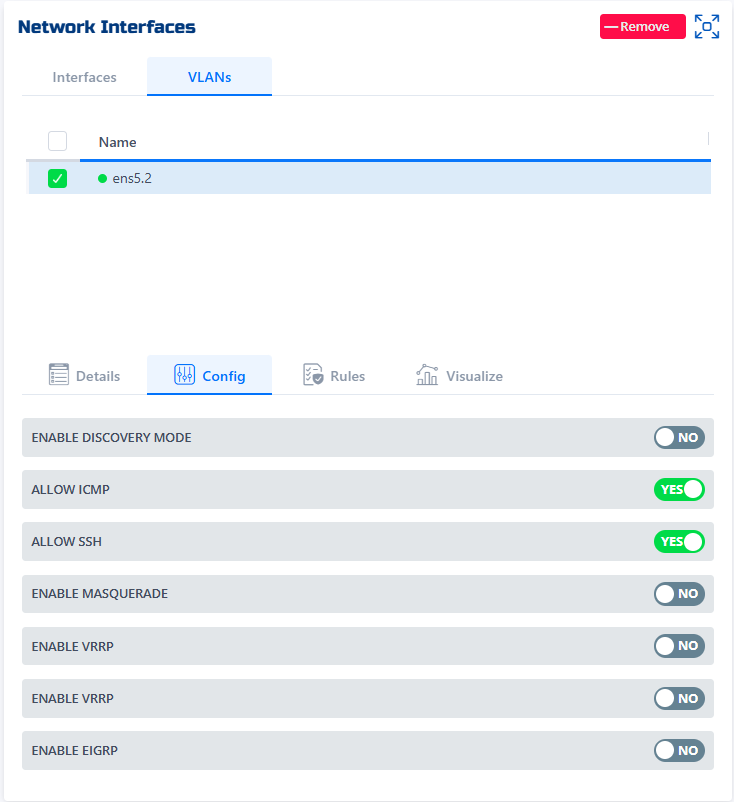
Removing a VLAN
- Select the VLAN you want to remove from the VLANs list.
- Click the Remove button in the top right corner.
- Confirm the deletion when prompted.
- Click Save to apply the change. Note: Removing a VLAN does not take effect until you hit the Save button.
Example VLANs
-
Add VLAN 2 on parent interface
ens5with DHCP enabled and allow ICMP/SSH:- ID: 2
- Parent: ens5
- IP & CIDR:
192.168.2.1/24 - DHCP: ON
- Allow ICMP: YES
- Allow SSH: YES
-
Remove VLAN
ens5.2:- Select
ens5.2in the VLANs list - Click Remove
- Confirm and Save
- Select