Build access policies
An access policy grants a set of source connectors permission to reach a set of destination connectors. Until an access policy links them, two connectors cannot communicate. This is how zero trust access is granted.
Policies link your provider infrastructure to customer deployments. The access policy builder lets you author them visually and review exactly what they expand to before saving.
For the underlying model, see Access policies in Key concepts.
:::note Two places to do this
- Across the provider: the main nav's Resources section → Access Policies lists every policy in the provider.
- For one customer: Customers → pick a customer → the dashboard's Access Policies tab shows only that customer's policies.
See Two perspectives: Resources and the customer dashboard. :::
Open the access policy builder
-
Sign in to the Customer Connect console. Service provider admins land on the provider dashboard; customer admins land on their own scoped dashboard.
- Go to Access Policies and click New Access Policy to open the builder.
Build the policy
The access policy builder form has two sections: Details and Criteria.
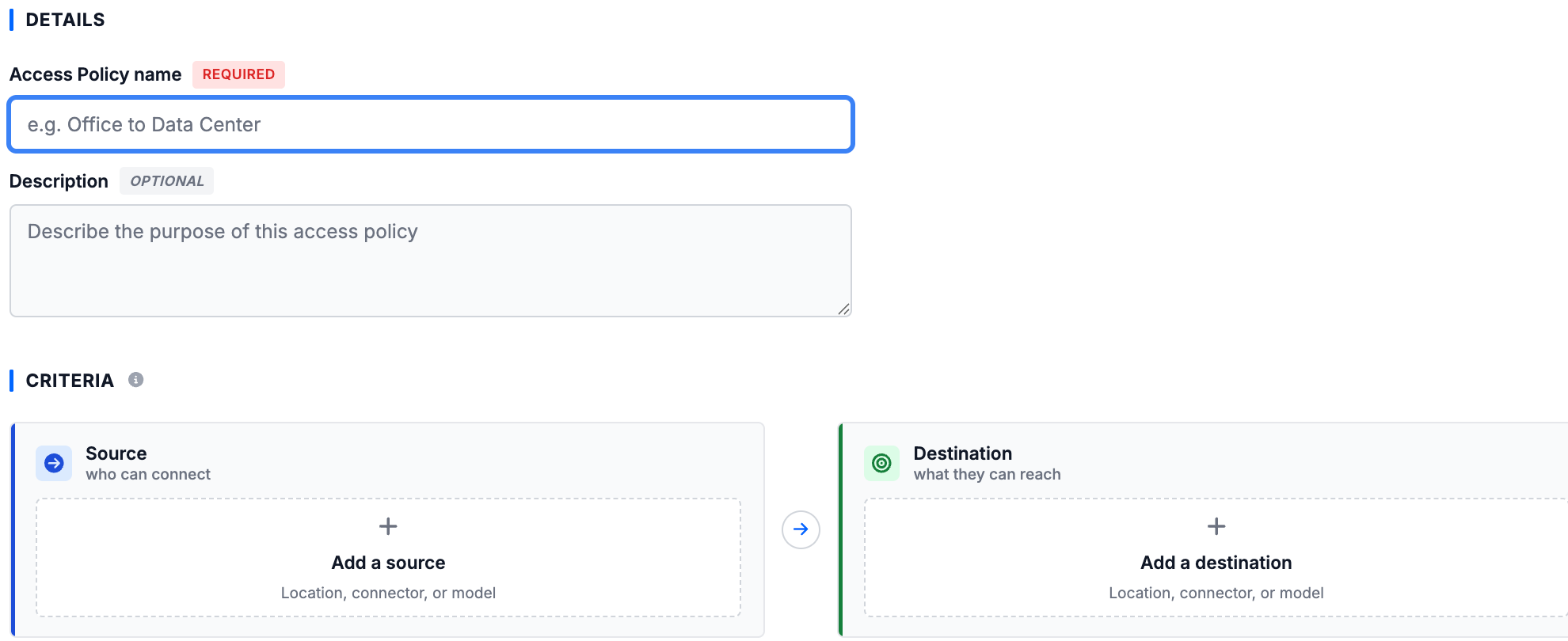
Details
- Enter an Access Policy Name. This is required.
- Optionally add a Description of the policy's purpose.
Criteria
The Criteria section has a Source side and a Destination side. Build each side by adding the connectors it covers:
- Under Source, click Add a source.
- Search for and select what to include. You can add by:
- Locations: Every connector at a location.
- Connectors: Specific connectors by name.
- Models: Every connector built from a connector model.
- All: Every connector.
- Under Destination, click Add a destination and select its connectors the same way.
Add as many entries as you need to either side. Both sides target the same four kinds of endpoint — Location, Connector, Model, or All; the builder does not narrow a destination to a single application.
Review and save
The access policy builder expands your criteria into concrete source-to-destination connector pairs, shown in the Preview. The Preview has two toggles, and you can switch between them at any time:
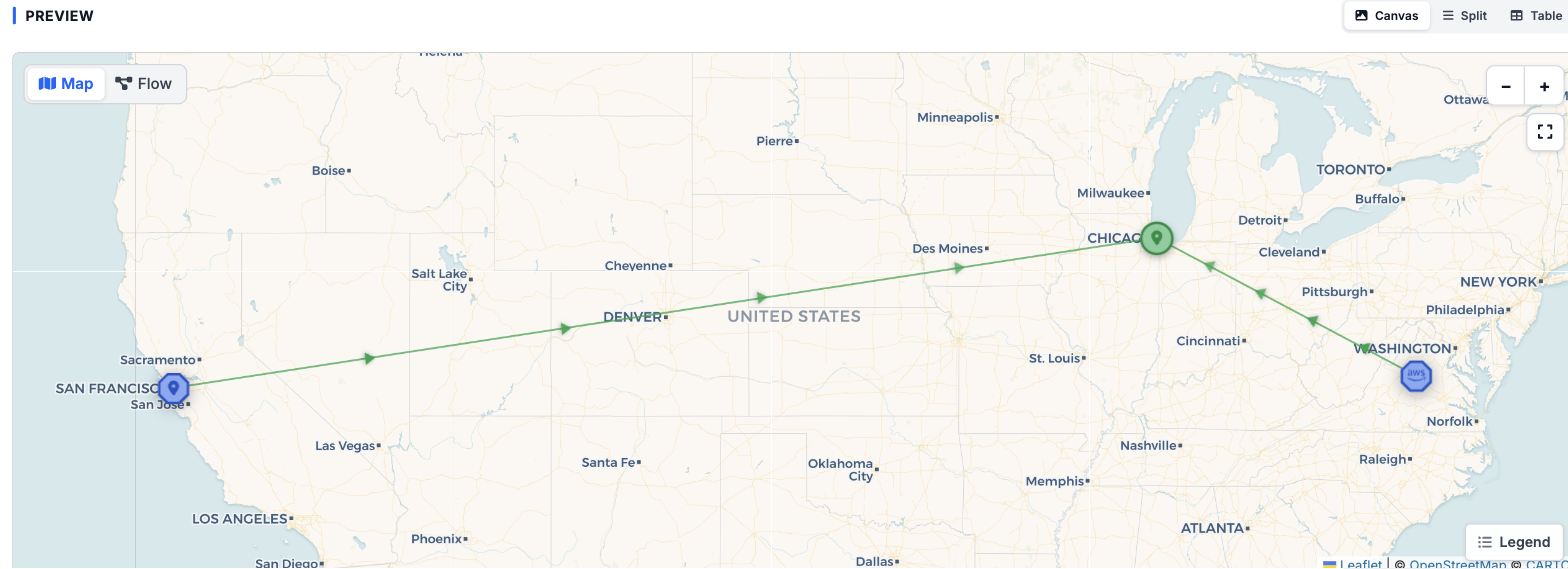
- The Map / Flow toggle picks the visualization:
- Map: A geographic view of the locations involved, with connecting lines for the policy.
- Flow: A logical view where nodes are locations and connectors and edges are access policies.
- The Canvas / Split / Table toggle picks the layout:
- Canvas: The visualization on its own.
- Split: The visualization and the table side by side.
- Table: A flat list of the resulting source and destination connector pairs.
Review the policy before saving:
- Confirm the pairs are what you intend.
- Watch for validation warnings, such as offline connectors.
- Adjust an entry and the preview updates.
Use the Table layout to scan the full list of pairs. When everything looks right, click Create Access Policy. The policy takes effect immediately, and the matched connectors can communicate.
Best practices
- Create policies for repeatable access patterns, such as monitoring, support, or backup.
- Document each policy's purpose clearly in its description.
- Review and audit applied policies regularly.
Next steps
- Monitor the resulting traffic with Live Audit
- Deploy more connectors to extend the policy's reach