Manage locations
A location is a place where your connectors run, either a physical site or a virtual cloud region. Locations are the unit of infrastructure across the platform: every connector belongs to one, the network map plots them, and access policies can match on them.
For the concept, see Locations in Key concepts.
:::note Two places to do this
- Across the provider: the main nav's Resources section → Locations lists every location in the provider.
- For one customer: Customers → pick a customer → the dashboard's Locations tab shows only that customer's locations.
See Two perspectives: Resources and the customer dashboard. :::
Location types
Every location has a type that reflects where its connectors run:
- Physical Site: A real site with a street address, such as an office, data center, or plant floor.
- Virtual / Cloud: A cloud region or logical location, such as AWS, GCP, Azure, OCI, or another provider.
You don't need every location up front. Start with the sites you're deploying first, and add more anytime.
Open the locations page
-
Sign in to the Customer Connect console. Service provider admins land on the provider dashboard; customer admins land on their own scoped dashboard.
- Go to Locations. Provider admins see every customer's locations plus provider-owned ones; customer admins see their own.
- Use the search field to filter the list by location or connector name.
Create a location
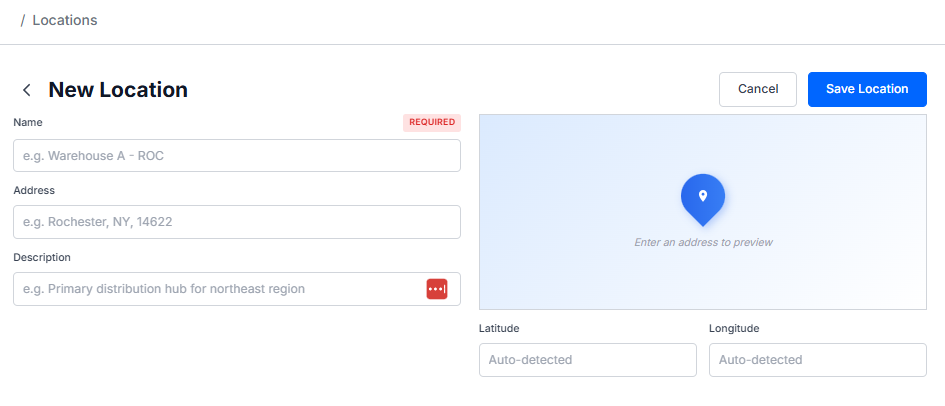
- Click Add Location.
- Enter a Name.
- Choose the Type. The rest of the form changes to match:
- Physical Site: Enter a street Address. Latitude and longitude are geocoded from it and plot the location on the network map used in monitoring.
- Virtual / Cloud: Pick a Cloud Provider (AWS, GCP, Azure, OCI, or other) and its region instead of a street address.
- Optionally add a Description.
- Click Save Location.
Edit a location
Click a location's edit icon (a pencil) in the Actions column to change its name, type, address, or description, then click Save Location. The edit page has two tabs — Details and Live Audit — so you can review the location's live activity without leaving the page. Edits take effect immediately; existing connectors keep running. Clicking the location's row instead expands it to show its connectors.
Duplicate a location
The Actions column also offers a Duplicate action. It clones the location along with its connectors, giving you a copy to adjust rather than rebuilding a similar site from scratch.
View connectors at a location
Expand a location row with the > chevron to show its connectors inline — each connector's status, enrollment, type, and model — without opening the location. From here you can:
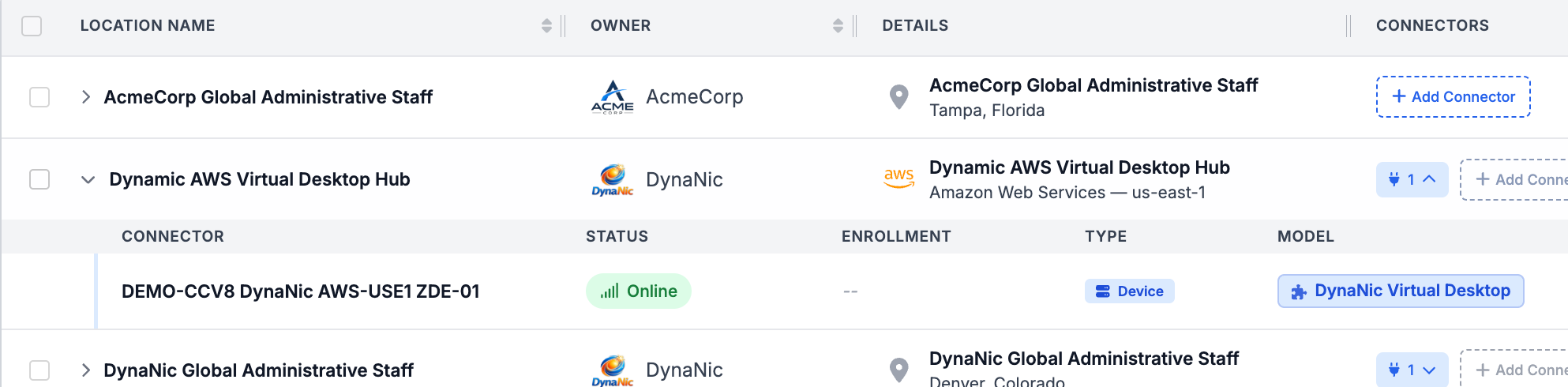
- Download a connector's enrollment token (see Reissue a token).
- Assign Customer Admin operators to connectors at this location.
- Jump into a connector to edit it.
Pause a location's connectivity
You can temporarily take a location out of service without deleting it. In the customer dashboard's Locations list, open a location row's ⋮ menu and choose Pause Connectivity. Confirm the prompt: the location stops accepting connections through every connector at it, existing sessions may be interrupted, and the row shows a Paused status. The configuration is retained, so you can bring it back at any time with Resume Connectivity from the same menu.
Individual connectors at a location can be paused and resumed the same way from the expanded row — see Pause a connector. Pausing is a connectivity action, separate from editing a location.
Delete a location
Deleting a location shows an impact confirmation listing the connectors and policies that depend on it. Delete those first or accept the cascade.
Next steps
- Deploy and enroll connectors at this location
- Build access policies that match by location