Manage custom variables
A custom variable is a reusable named value you define once at the provider, customer, or location scope and reference
in connector-model and template fields as a {{variable}} placeholder. Each time you deploy that model or template, the
placeholder is filled in with the value defined for that customer or location, so one model fits everyone.
For endpoints, validation rules, and resolution behavior, see Custom variables.
Choose a scope
Each scope keeps its own list of variables, referenced by its own token. Pick the scope where the value naturally belongs:
| Scope | Reference token | Use for |
|---|---|---|
| Provider | {{provider.custom.<name>}} | Values shared across your whole network |
| Customer | {{customer.custom.<name>}} | Values set separately for each customer |
| Location | {{location.custom.<name>}} | Values set per site, like a local host or subnet |
Open a scope's variables
-
Sign in to the Customer Connect console. Service provider admins land on the provider dashboard; customer admins land on their own scoped dashboard.
-
Open the scope you want to manage:
- Provider: Go to Custom Variables in the sidebar.
- Customer: Go to Customers, find the customer's row, open the ⋮ (more actions) menu at the far right, and select Custom Variables.
- Location: Go to Locations and click the edit icon (a pencil) on the location's own row, not on a connector row beneath it. Then click Custom Variables at the top of the location's page.
Each path opens the Custom Variables page scoped to that provider, customer, or location. On the provider-level page, the Viewing switcher at the top also lets you jump to a customer's or a location's variables in place.
The Custom Variables page has two sections:
- Custom variables: The editable list, with Name, Value, Reference, and Actions columns. The Reference column shows each variable's exact token with a copy button.
- Built-in variables: A read-only list of values that are always available with no setup. They resolve from the
scope's own fields, like
{{provider.name}}or{{location.address}}, and have no.custom.segment.
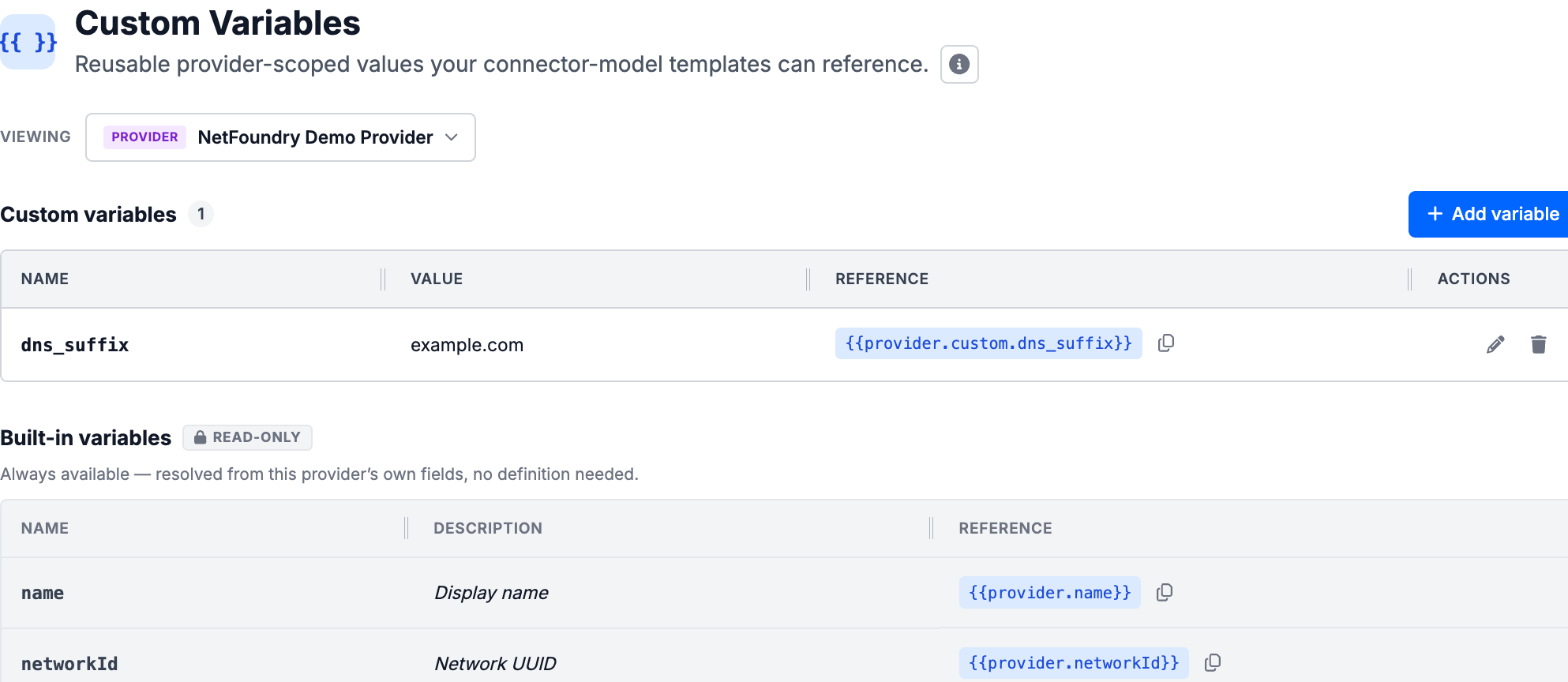
For an illustrated walkthrough of how a placeholder resolves, click the info icon next to the page description to open the How variables work panel.
Add a variable
-
Go to Custom Variables in the sidebar. To add the variable at the customer or location scope instead, open that scope's page as described in Open a scope's variables.
-
Click Add variable.
-
Enter a Name.
Use letters, numbers, and underscores only. The name must be unique within the scope. If the name matches a built-in field (like
name), the form warns you that yours resolves separately as the.custom.token. -
Enter a Value.
The form previews the exact Reference token as you type, with a copy button.
-
Click Save.
Reference a variable in a model or template
Connector-model and template fields that accept variables are marked with a variable glyph ("Supports variables"); click the glyph for a quick summary of the tokens each scope provides.
-
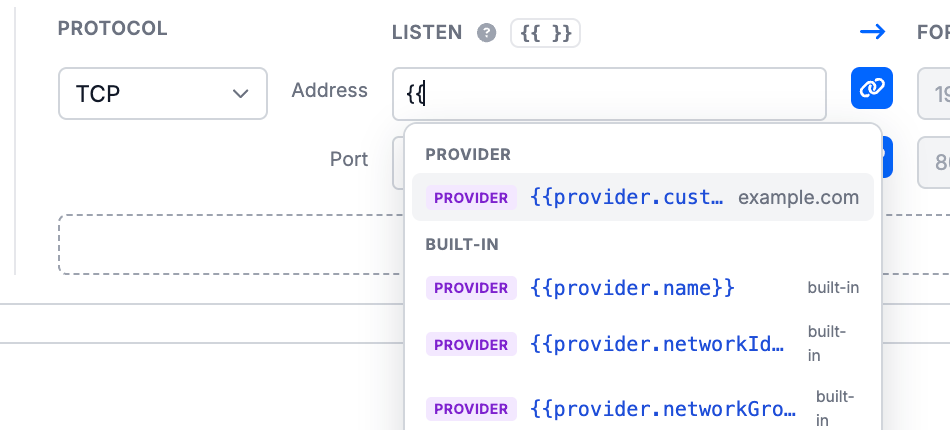
Click into a field that supports variables and type
{{.A typeahead opens with your variables grouped by scope, plus the built-ins.
-
Pick a variable with the arrow keys and insert it with Enter or Tab, or paste a reference token you copied from the Custom Variables page.
Values resolve when the model or template is applied to a customer or location.
Resolution is strict. If a deployment references a variable that isn't defined at the scope it names, the deployment fails with an error listing the missing variables. Nothing is created with a blank value. Define the variable at that scope (or fix the token) and retry.
Edit or delete a variable
Open the scope's Custom Variables page (see Open a scope's variables), then use the row's Actions:
- Click the pencil icon to change a variable's value (or rename it).
- Click the trash icon to delete it. Deleting runs a usage check first: if the variable is still referenced, a warning modal appears listing where it's used before you confirm removal from the scope.
Changes affect future deployments only. Resources already created from a model or template keep the values that were resolved when they were deployed.
Next steps
- Manage connector models and templates that reference your variables
- Custom variables: Endpoints, limits, and resolution rules