Configure branding
The Branding tab in Settings sets the names and logos shown in the console. You manage your own provider branding and every customer's branding from the same page. A left-hand list shows your provider at the top and your customers below it. Select an entry to edit its branding in the panel on the right.
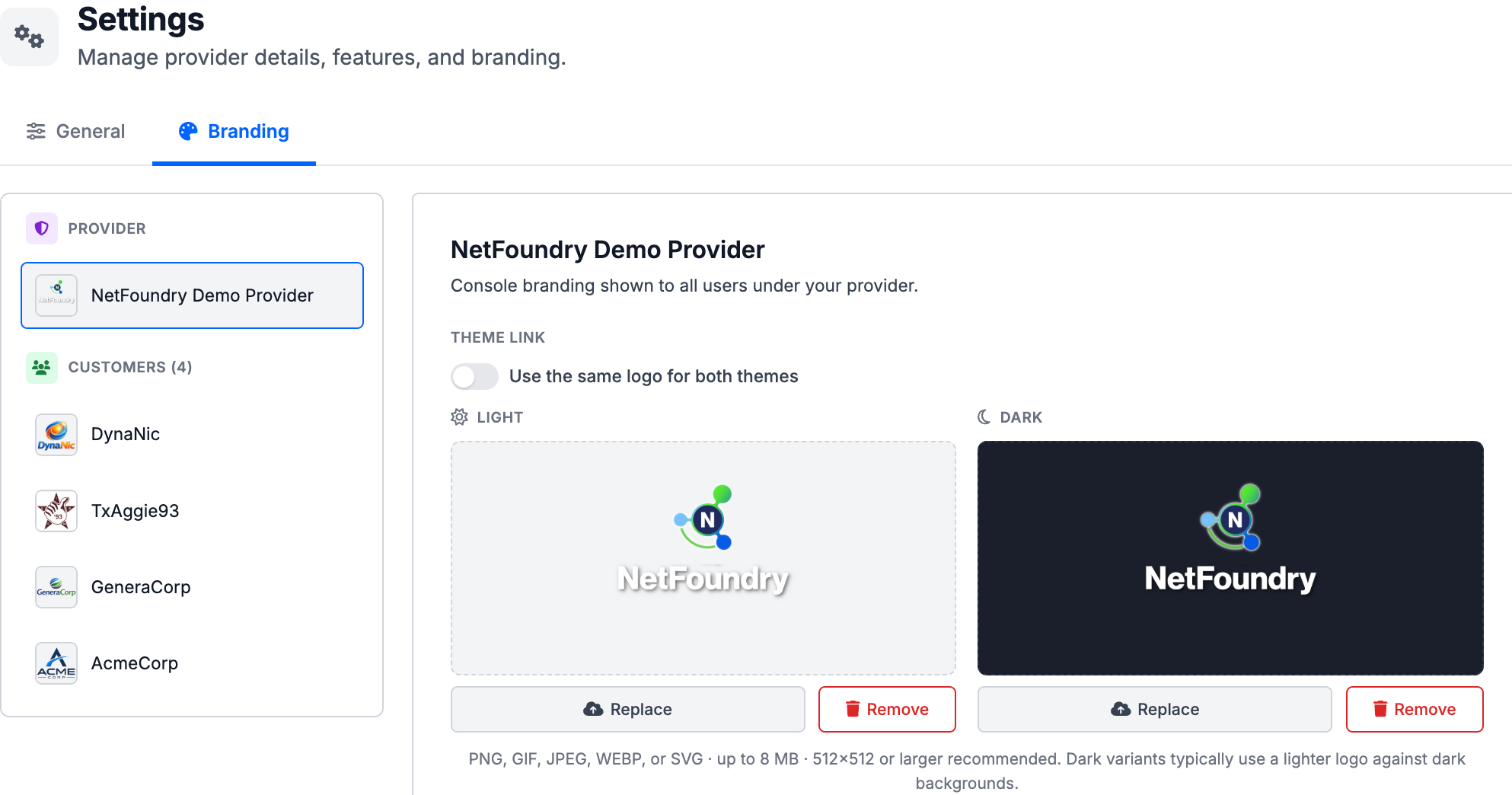
Set provider branding
Your provider branding is the name and logo shown to everyone under your provider — operators and members alike.
-
Sign in to the Customer Connect console. Service provider admins land on the provider dashboard; customer admins land on their own scoped dashboard.
- In the sidebar, go to Settings, then open the Branding tab.
- Select your provider at the top of the list.
- Upload a light and a dark logo. To use one logo for both themes, turn on Use the same logo for both themes, then upload a single logo.
- Click Save.
Your provider's name is set separately, on the General tab of Settings.
A logo can be a PNG, GIF, JPEG, WebP, or SVG, up to 8 MB. NetFoundry recommends 512×512 or larger. Dark variants usually use a lighter logo so it stands out against a dark background.
Set customer branding
You can set a name and logo for each of your customers. This controls how the console looks for the operators and members scoped to that customer, and doesn't affect your provider branding.
- In the sidebar, go to Settings, then open the Branding tab.
- Select a customer from the list.
- Edit the Name and upload the light and dark logos.
- Click Save.
Use customer branding to white-label the console for each customer: their name and logo, your platform.